The Adapter Manager
Every agent in Paperclip needs an adapter — the shim that lets the control plane talk to a specific AI runtime. Built-in adapters ship with the product (Claude Code, Codex, Gemini, OpenCode, Cursor, Pi, Hermes, HTTP, Process, OpenClaw Gateway), and you can extend the set by installing external adapters from npm or a local path.
The Adapter Manager is the single place where you see which adapters your instance knows about, toggle their visibility in the agent menus, install and upgrade external packages, and pause external overrides on built-ins.
This guide walks through the page itself. For the per-adapter config fields (working directory, model names, timeouts, environment variables) see Agent Adapters. For the technical catalog of every adapter type — wire format, capabilities, model listings — see the Adapter Reference.
Alpha: The external-adapter runtime is in alpha. APIs, on-disk layout, and the list of exposed capabilities can change between versions. For production use, pin adapter package versions.
Opening the Adapter Manager
The Adapter Manager lives under Settings → Adapters. The breadcrumb reads Company → Settings → Adapters, and the page header shows a CPU icon, the page title, and an Alpha badge.
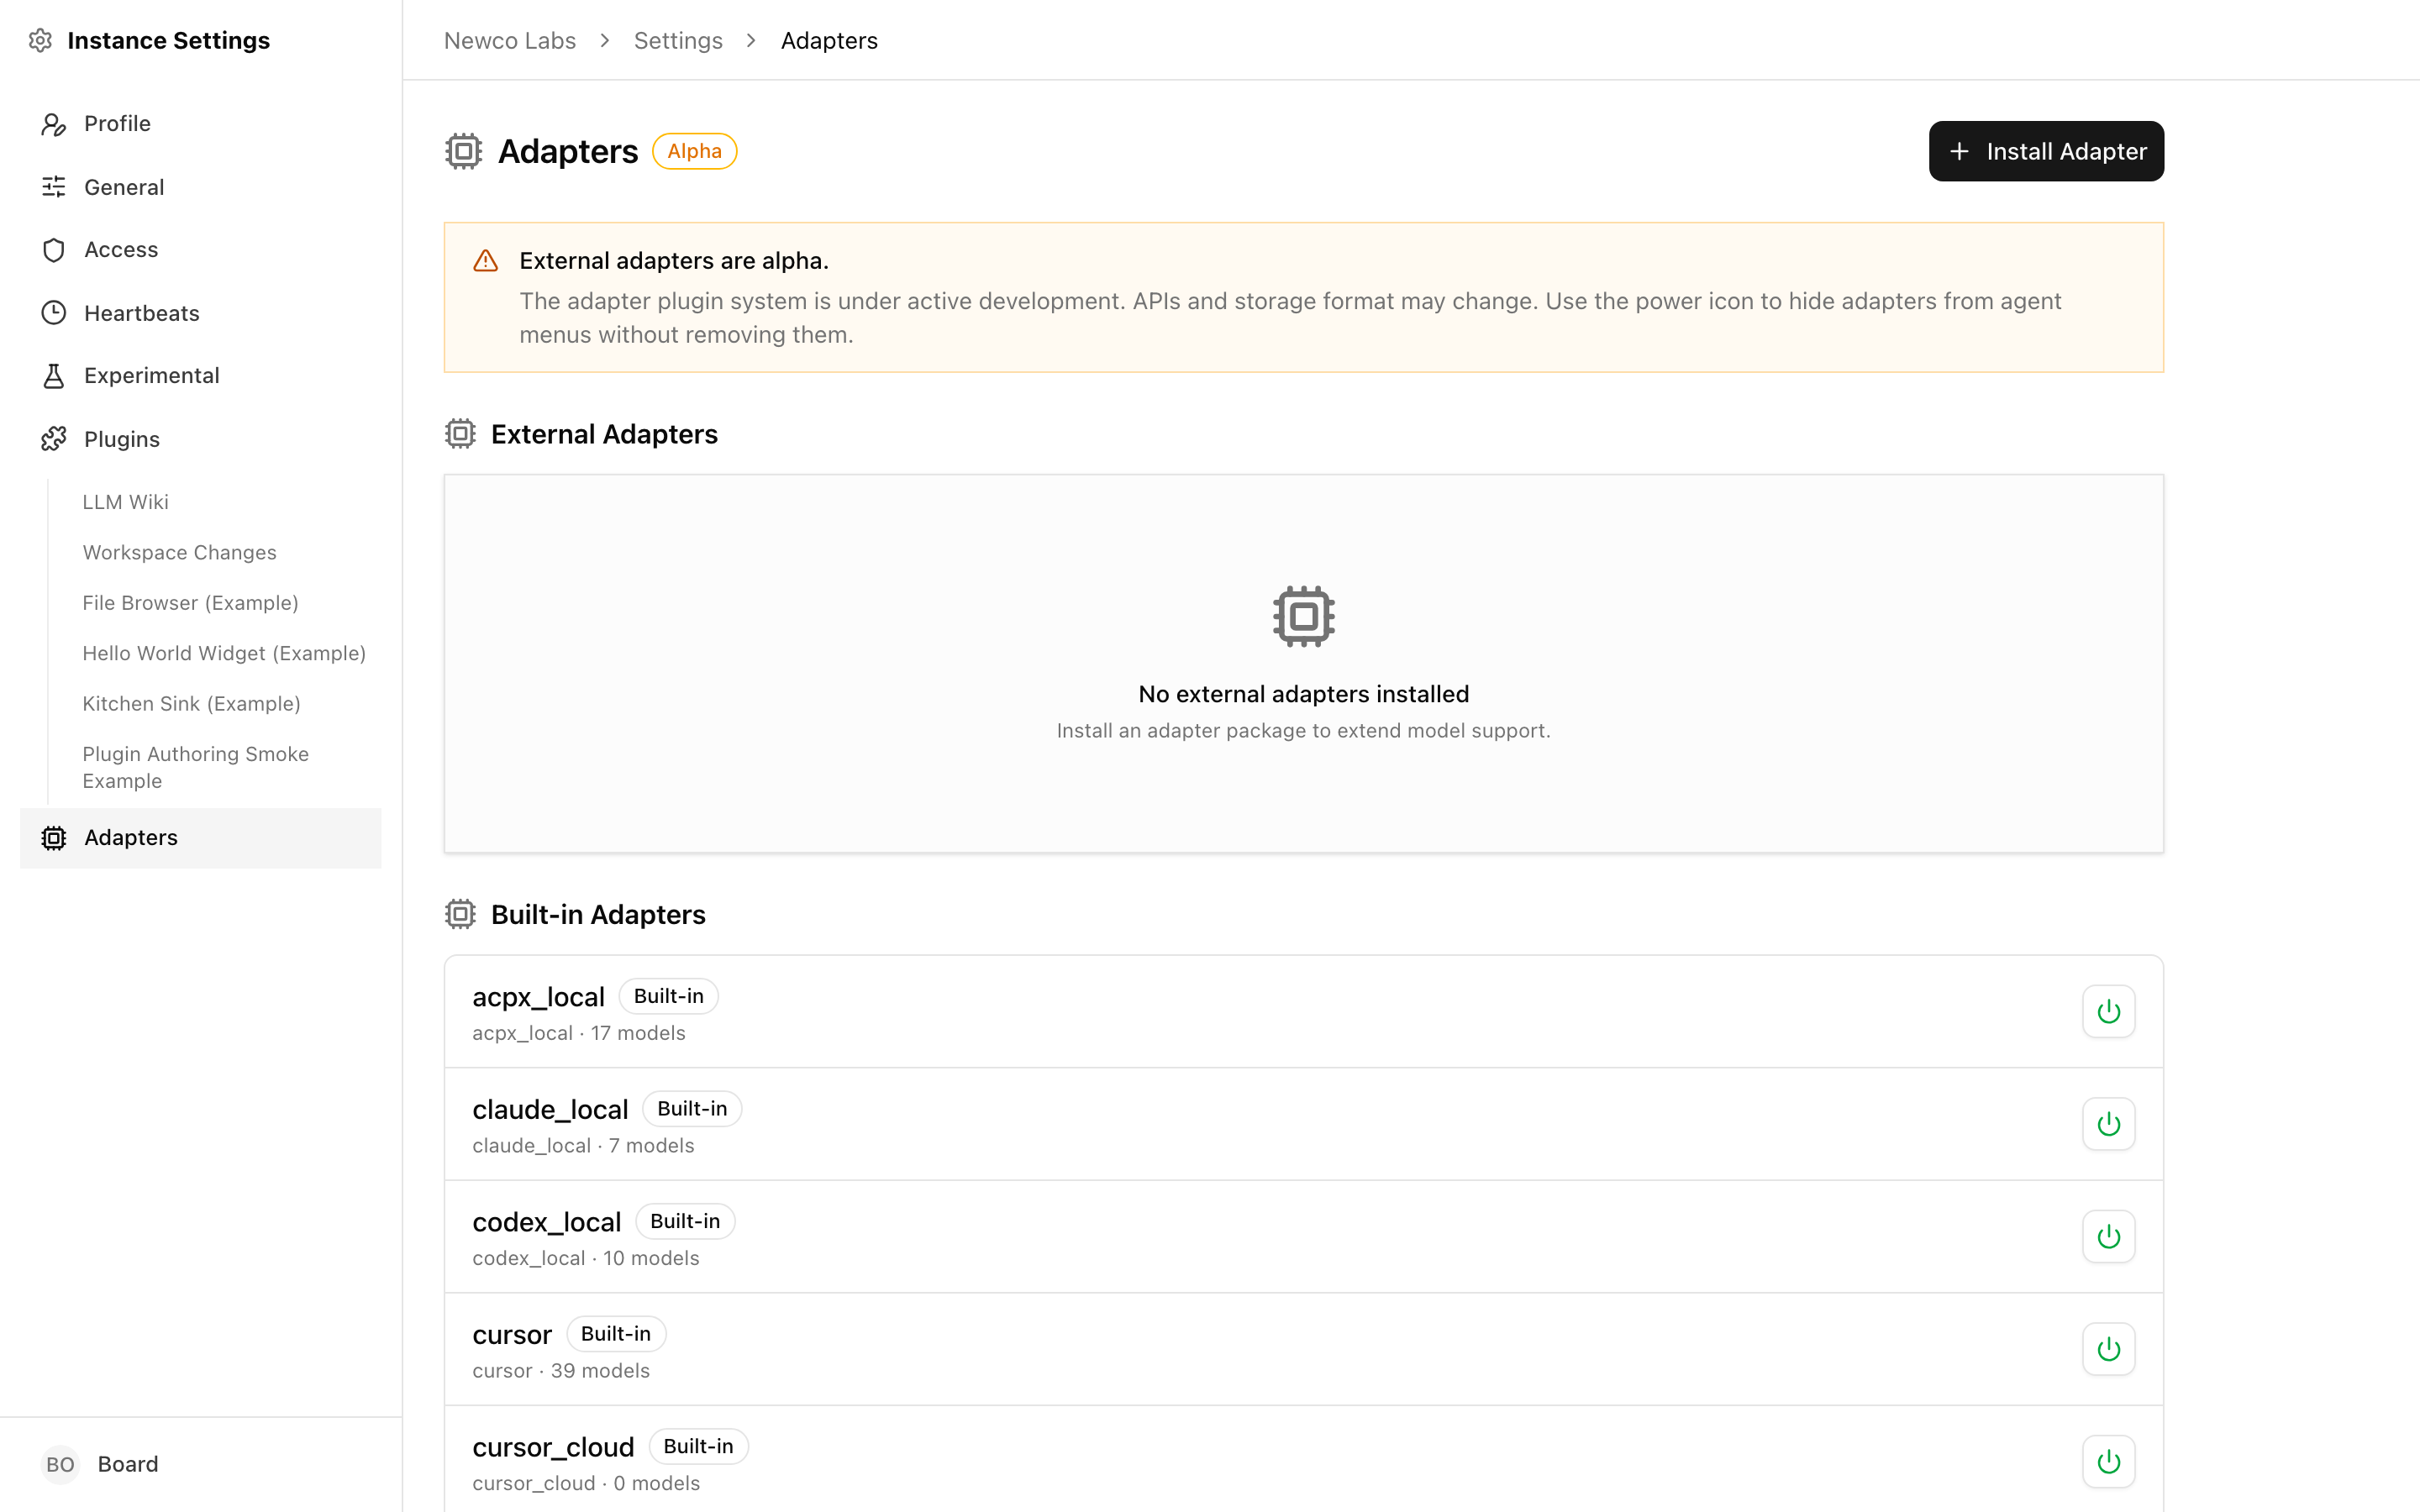
Below the header there's a persistent amber notice reminding you that external adapters are alpha, and that the power icon on each row hides an adapter from the agent menus without removing it.
The two lists
The page is split into two sections:
- External Adapters — adapter packages you (or another operator) installed. Each row is removable and can be reloaded or reinstalled in place.
- Built-in Adapters — adapters that ship with Paperclip. These cannot be removed, but they can be hidden from the agent dropdown.
When an external adapter declares the same type as a built-in (for example, an external claude_local package), the server treats it as an override. The override row appears in External Adapters with a blue Overrides built-in badge, and a synthetic row appears in Built-in Adapters with an Overridden by … badge so you can still see which built-in is affected.
What each row shows
Every row shows the same block of metadata:
- The adapter's display label (
Claude Local,Codex Local, your package'slabel, …). - A Built-in or External badge.
- For external rows, an icon indicating source: a folder icon for installed from local path, a package icon for installed from npm.
- A version badge (
v0.3.2) when the package declares one. - Any of the override/disabled badges listed below.
- A one-line meta row:
adapter.type · package-name · N models.
Badges you may see:
| Badge | Meaning |
|---|---|
Built-in |
Ships with Paperclip. Cannot be removed. |
External |
Installed by you. Can be removed, reloaded, reinstalled. |
Overrides built-in (blue) |
This external adapter replaces a built-in of the same type. |
Overridden by … (blue) |
This built-in is currently replaced by an external. |
Hidden from menus (amber) |
Adapter is installed and loaded, but the agent-config dropdown will not offer it. |
Override paused (amber) |
External override is loaded but temporarily not taking effect — the built-in is active instead. |
Enabling and disabling an adapter
Every row has a power icon in the action column. Its exact behaviour depends on what you clicked:
- Built-in or plain external adapter. Clicking the power icon toggles menu visibility. When it's dim/grey, the adapter still exists and still works for any agent already configured to use it — it just doesn't appear in the adapter dropdown when you create or edit an agent. Clicking again shows it in the menu.
- External adapter that overrides a built-in. The power icon controls the override pause instead of menu visibility. Pausing the override does not uninstall the external package; it simply tells the runtime to fall back to the built-in until you resume.
Hover the icon to see the tooltip for the current state — the wording switches between Show in agent menus, Hide from agent menus, Pause external override, and Resume external override so you always know which action you're about to take.
Note: Hiding a built-in from menus is an operator preference. Existing agents keep working. If you want to truly stop an adapter from running, remove the external package, or — for built-ins — change the affected agents to a different adapter type first.
Installing an external adapter
Click Install Adapter in the top right of the page. A dialog opens with a two-button source switch: npm package or Local path.
From npm
- Choose npm package (the default).
- Enter the package name — for example,
@my-org/paperclip-adapter-openrouter. - Optionally enter a version; leave it blank for
latest. - Click Install.
Paperclip fetches the package, validates that it exports a createServerAdapter() factory, registers the adapter type, and adds a row to External Adapters. A toast confirms the install (Adapter installed — Type "..." registered successfully. (v...)). On failure the dialog stays open and shows the error.
From a local path
Pick Local path when you're developing an adapter or using one you've cloned somewhere on disk:
- Switch to Local path in the dialog.
- Either paste an absolute path (
/mnt/e/Projects/my-adapter,/Users/me/code/my-adapter,E:\Projects\my-adapter) or click the Choose… button for platform-specific instructions. - Click Install.
Linux, WSL, and native Windows paths are all accepted — Windows paths are auto-converted. Local-path installs show a folder icon in the row so you can tell them apart at a glance; they do not offer the Reinstall action (there's no registry to pull from).
Tip: The adapter package must export a
createServerAdapter()function that conforms to Paperclip's adapter contract. See Creating an Adapter.
Reload, reinstall, and remove
External adapters have three lifecycle actions, shown as icon buttons on the right of each row.
Reload (circular-arrow icon) Re-imports the adapter module in place. Use this after changing the code of a local-path adapter — the runtime hot-swaps the module and invalidates any cached config parsers or UI schemas. Existing agents pick up the change on their next run.
Reinstall (download icon, npm installs only) Pulls the latest version of the package from npm and reloads it. Clicking the icon opens a confirmation dialog that shows the package name, the installed version, and the latest version available on the npm registry:
- Package —
@my-org/paperclip-adapter-x - Current —
v0.3.2 - Latest on npm —
v0.4.0
If the installed version already matches the latest, the dialog says "Already on the latest version." You can still reinstall to force a clean re-fetch. Click Reinstall to apply. A toast confirms success (Adapter reinstalled — ... updated from npm. (v...)).
Remove (trash icon) Uninstalls the external adapter. A confirmation dialog warns that the adapter will be unregistered, removed from the adapter store, and — for npm installs — cleaned up from disk. Agents still configured to use that adapter type will start failing on their next run, so reassign them to a different adapter first.
Built-in rows never show the trash icon. They cannot be removed.
Per-adapter configuration
The Adapter Manager itself does not hold configuration for a specific adapter. Adapter config lives on each agent that uses the adapter: working directory, model selection, timeouts, environment variables, and whatever extra fields the adapter declares through its UI schema.
To configure a built-in adapter, open the agent you want to change and edit its adapter config on the agent form.
To configure an external adapter, the same pattern applies — the Agent Manager renders the form fields the external adapter's createServerAdapter() reports through its UI schema, including any custom widgets the adapter ships.

For field-by-field walkthroughs of the common built-ins, see Agent Adapters. For the technical contract that adapters implement (including the UI parser schema), see Adapter UI Parser.
Health and troubleshooting
Adapters are simpler than plugins — there's no background worker, no scheduled jobs, and no long-running state to go wrong. "Health" for an adapter mostly comes down to: did the module load, and does it report any models?

The row meta line (type · package · N models) is your first signal:
0 modelson a model-listing adapter usually means the adapter loaded but couldn't reach its provider (missing API key, offline, auth failure). Check the agent's environment variables and the provider's status page.- Row missing after install — the install failed. Reopen the install dialog; the error toast will have explained why (invalid package, manifest missing,
createServerAdapter()not exported). - Reload or reinstall returns an error toast — the new code didn't load. The previous version stays active. Fix the error (often a build output issue for local-path installs), then reload again.
- Agents fail with "adapter not found" — the adapter was removed or the
typestring on the agent doesn't match an installed adapter. Reinstall the package or change the agent's adapter. - Override paused unexpectedly — someone clicked the power icon on an overriding external row. Click it again to resume the override.
If the list itself fails to load you'll see a Loading adapters... line that never resolves or an error toast. Refresh the page; if it persists, check the server logs for adapter-registry errors.
Where to go next
- Agent Adapters — what each adapter does and which configuration fields it exposes on the agent form.
- Adapter Reference — technical catalog of every built-in adapter type.
- Creating an Adapter — how to author and publish an external adapter package.
- Adapter UI Parser — the schema contract your adapter uses to render config fields in the agent form.