Plugins
Some things Paperclip does out of the box — run agents, manage tasks, call adapters. Plenty of other things it does not, because they're too specific to your setup: a Hello World widget on the dashboard, a file browser for your project workspaces, a smoke-test runner for a third-party service you happen to use. Plugins are how you add those.
A plugin is a self-contained package that installs into Paperclip, runs its own background worker, and can contribute its own pages, widgets, and settings into the Paperclip UI. Unlike an agent adapter — which teaches Paperclip how to talk to a new AI model — and unlike a skill — which is a reusable instruction document an agent loads into its prompt — a plugin is a piece of software that extends Paperclip itself. It has its own code, its own process, and its own surface in the UI.
Plugins are in alpha. The runtime and APIs are still shifting, so expect breaking changes for now and pin versions where you can.
The Plugin Manager
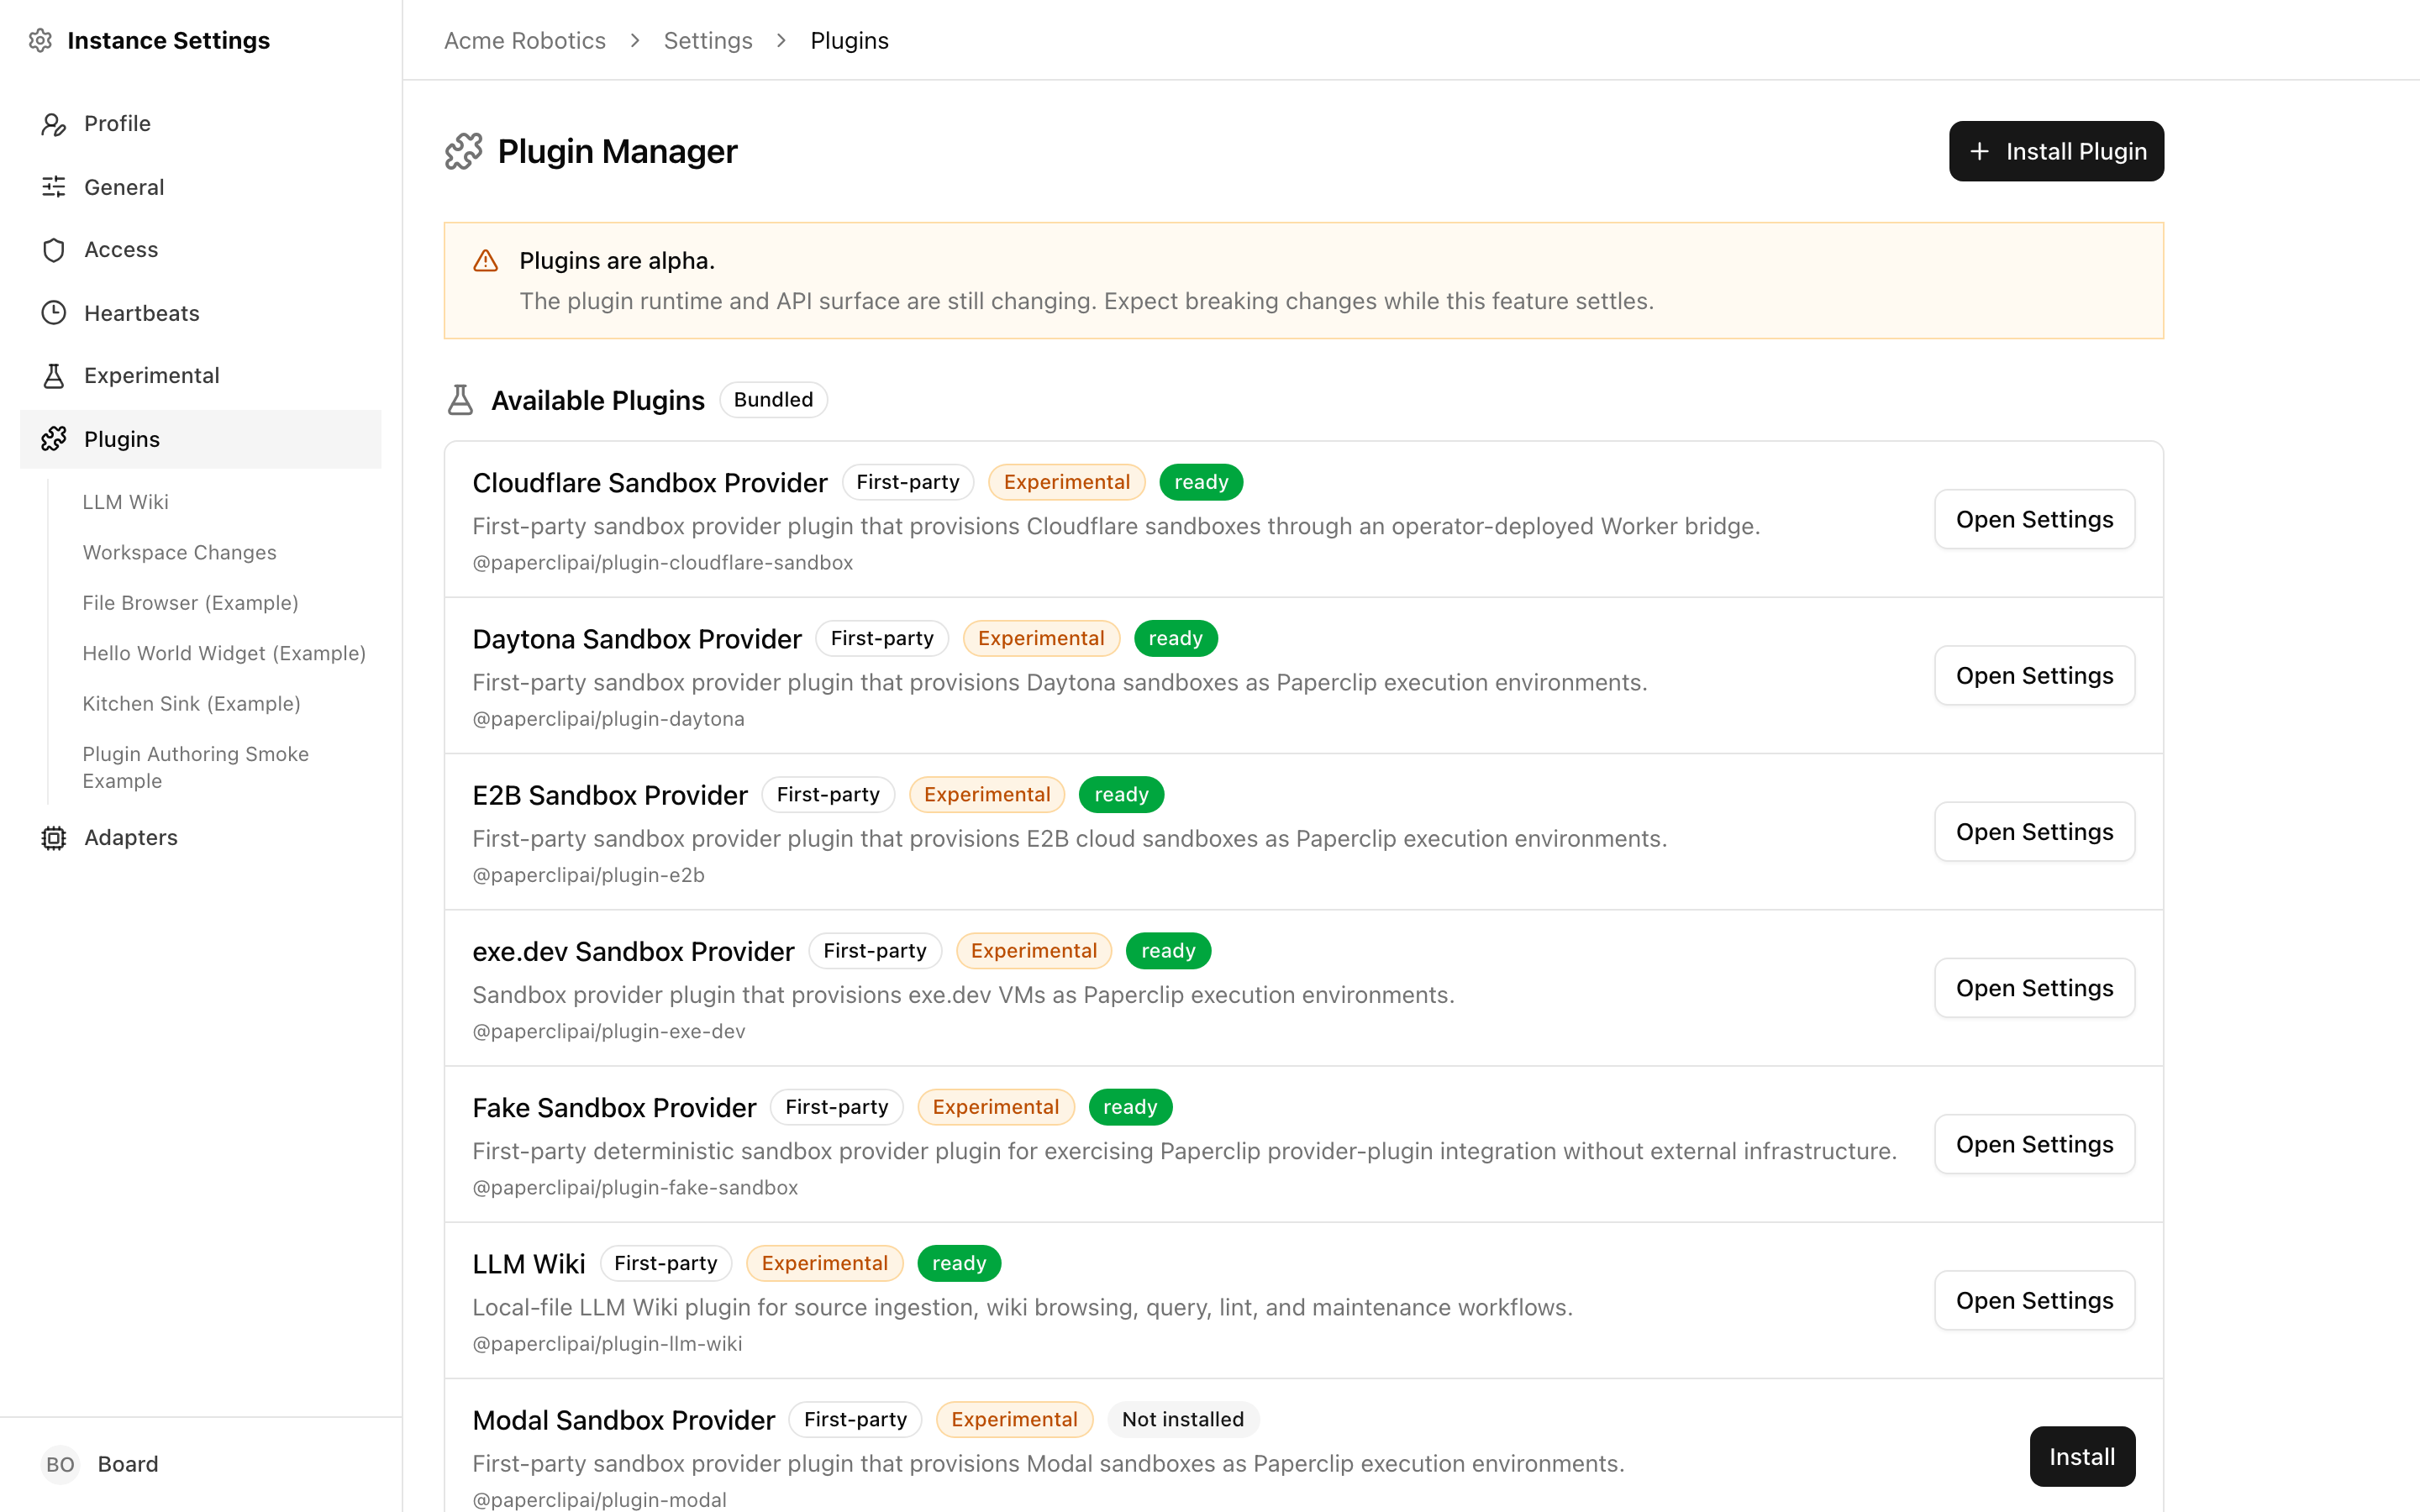
The Plugin Manager lives under Settings → Plugins. It's the single place where you install, enable, disable, configure, and uninstall plugins.
The page has two sections:
- Available Plugins — the plugins bundled with your Paperclip checkout, discovered automatically from the packages on disk. This includes the reference example plugins and first-party plugins like the LLM Wiki when they're part of your checkout. Each is labelled Bundled, and ones that aren't production-ready yet carry an Experimental badge. Useful for seeing what plugins can do and for smoke-testing the plugin runtime on a fresh instance.
- Installed Plugins — everything you've installed on this Paperclip instance. Each row shows the plugin name, its package and version, a short description, a status badge, and quick actions.
Status badges
Every installed plugin has a status that tells you what the runtime is doing with it.
| Status | What it means in practice |
|---|---|
| ready | The plugin is installed, enabled, and its worker is running. This is the steady state you want. |
| disabled | You (or another operator) turned the plugin off. Its worker is stopped, scheduled jobs don't fire, and any UI contributions are hidden. Config and data are preserved. |
| error | Something went wrong — the worker crashed on startup, a health check failed, or an upgrade broke. The plugin row shows a short error summary and a View full error button for the full stack trace. |
| upgrade_pending | A new version of the plugin has been staged, and it asks for capabilities the installed version didn't have. Paperclip is holding it offline until you approve the new permissions. |
| installed | A transient state right after install, before the first successful load. You usually won't see it for long — the plugin moves to ready (or error) within a second or two. |
| uninstalled | The plugin has been removed. It won't appear in the list anymore unless you reinstall it. |
If the badge is green it's running. If it's grey it's intentionally off. If it's red or amber, read the message — the UI is telling you something needs your attention.
Reading an error row
When a plugin is in error, the row expands to show a short error summary — the first non-empty line of the stored error message — and a View full error button. Clicking it opens a dialog with the complete stack trace or failure output, wrapped and scrollable.
The summary is usually enough to know what to do:
- "Cannot find module ..." or "Failed to load manifest" — the package is malformed or its build output is missing. Reinstall it, or rebuild it if you're developing locally.
- "Worker exited with code 1" — the worker crashed on startup. The full error has the stack trace. Most common causes: missing configuration (go fill in the settings form), a secret that hasn't been provided, or an external service the plugin depends on being unreachable.
- "Health check failed: ..." — the worker started but a health check didn't pass. The message names which check failed; fix the underlying issue, then click the power button to re-enable the plugin.
An errored plugin stays installed — you don't need to uninstall and reinstall to try again. Once you've addressed the cause, clicking Enable puts it through the error → ready transition and Paperclip tries to start the worker again.
Installing a plugin

There are two ways to get a plugin into Paperclip.
From the Available Plugins list. Bundled plugins ship inside the Paperclip repository. On the Plugin Manager page, scroll to the Available Plugins section and click Install next to the one you want. Paperclip installs it straight from the local checkout — no registry round trip.
Paperclip builds this list by scanning the plugin packages in your checkout, so what you see depends on what's bundled. Two kinds of plugin show up here:
- Reference examples — small, self-contained plugins that exist to demonstrate the runtime.
- First-party plugins — real plugins like the LLM Wiki when they're vendored into your checkout. These are also published to npm, so on instances that don't bundle them you'd install by full package name instead; see By npm package name below.
First-party plugins that are still maturing carry an Experimental badge in this list — they work, but their behaviour or configuration may change between releases, so pin versions where you can.
The reference examples that ship today:
- plugin-hello-world-example — adds a Hello World widget to the dashboard. The minimum-viable plugin, useful as a reference.
- plugin-file-browser-example — adds a Files link to project sidebars and a file-browser tab to the project detail page, scoped to the project's workspace.
- plugin-kitchen-sink-example — demonstrates the full plugin surface in one package: pages, widgets, settings forms, scheduled jobs, webhooks. Good for exploring what a plugin can do.
- plugin-authoring-smoke-example — a thin smoke test for the plugin authoring workflow. Useful if you're working on a plugin of your own and want to confirm the runtime picks it up.
- plugin-orchestration-smoke-example — a smoke plugin that exercises Paperclip's orchestration-grade plugin APIs (scheduled jobs, webhooks, plugin-driven agent interactions). Useful as a reference when you're building a plugin that needs to coordinate work over time, not just render a widget.
By npm package name. Click the Install Plugin button at the top right of the Plugin Manager. Paperclip asks for an npm package name (for example, @paperclipai/plugin-example). Submit it and Paperclip fetches, installs, and loads the package. Success or failure appears as a toast, and the plugin shows up in the installed list with its current status.
In both cases the install flow does the same underlying work: download the package, validate its manifest, persist the plugin record, then attempt to move it through installed → ready by starting its worker. If anything in that chain fails, the plugin is parked in error with the failure message attached — it stays installed so you can inspect what happened instead of silently disappearing.
Enabling and disabling
Each installed plugin has a power button in the actions column. The button toggles between two lifecycle transitions:
- Disable (when the plugin is
ready) — Paperclip stops the worker, cancels any in-flight scheduled jobs the plugin owns, and hides the plugin's UI contributions. Your configuration and any data the plugin has stored are preserved. - Enable (when the plugin is
disabled,error, orupgrade_pending) — Paperclip starts the worker again and, if startup succeeds, moves the plugin back toready.
Disabling is the right move when a plugin is misbehaving, when you want to pause its scheduled jobs temporarily, or when you're about to change some external dependency and you'd rather the plugin not fire in the meantime. It's a safe, reversible operation — think of it as a "sleep" rather than a "remove".
Uninstalling
The trash icon next to the power button removes a plugin. Paperclip asks you to confirm, because the action is not reversible from the UI: the plugin package is removed from disk, the installation artifacts are cleaned up, and the plugin is marked uninstalled. To get the plugin back, you'd reinstall it fresh.
Uninstalling stops the worker first, the same way disable does, so in-flight work is drained cleanly before the package is removed.
What "disabled" actually stops
Worth being explicit about, because it's the difference between "I'm pausing this for an hour" and "I need to start over":
- Stopped: the worker process, scheduled job runs, webhook delivery processing, UI contributions (pages, widgets, settings slots), and any health-check polling.
- Preserved: the plugin record itself, saved configuration (including secrets), historical job-run and webhook-delivery records, and log entries. When you re-enable the plugin everything resumes where it left off, on the same config.
This matters for plugins that integrate with billed services. Disabling stops the polling and the scheduled work — so you stop paying the API bill — without forcing you to re-enter credentials the next time you turn it back on.
Upgrades
When a plugin is upgraded to a new version, Paperclip compares the capabilities declared in the new manifest against the ones you originally approved.
- If the new version asks for the same capabilities or fewer, Paperclip upgrades it in place and the plugin returns to
readyon the new version. - If the new version asks for new capabilities that weren't there before — access to a new data surface, a new integration point — Paperclip parks the plugin in
upgrade_pending. The worker stays stopped until an operator looks at what changed.
To apply an upgrade pending approval, open the plugin's detail page, review the updated capabilities and description, and click Enable. That moves the plugin back to ready on the new version. If you're not happy with the new capabilities, you can leave the plugin in upgrade_pending indefinitely, or uninstall it.
This gate exists so plugins can't quietly grow permissions on you between versions. The first time a capability is requested is always a deliberate action you took.
The plugin detail page
Clicking a plugin's name — or the Configure button — opens the plugin detail page. This is where a plugin gets to show you its own surface inside Paperclip.

The detail page has two tabs:
- Configuration — the plugin's description, author, categories, and settings form (or a custom settings UI the plugin ships).
- Status — runtime diagnostics: worker process state, recent scheduled jobs, recent webhook deliveries, live health checks, and a rolling log of recent entries.
A plugin can also declare a page slot. When it does, the plugin gets its own route at /<company-prefix>/plugins/<plugin-id> and renders whatever it wants there — a full page, a dashboard, a multi-step flow. This is how something like the file-browser example adds a Files tab to project pages, or how a hypothetical CRM plugin might add a Contacts view to the sidebar.
From your perspective as an operator, plugin pages behave like any other Paperclip page: they're scoped to the currently selected company, they show up in breadcrumbs, and they respect your permissions. The plugin just gets a canvas to render on.
Plugins can also contribute smaller pieces — a widget on the dashboard, a tab on the project detail page, a link in a sidebar — rather than a full standalone page. These show up inline in the surfaces you already use, so you don't always have to navigate to the plugin detail page to get value out of it. The Hello World example adds a dashboard widget; the file-browser example adds a project tab; the kitchen-sink example scatters contributions across several surfaces so you can see what's possible.
If two plugins happen to contribute a page on the same route, Paperclip refuses to choose between them and surfaces a conflict message instead. Uninstall one of the colliding plugins, or use the plugin-id URL directly (/<prefix>/plugins/<plugin-id>) to reach a specific one while you sort it out.
Plugin settings
Most plugins have some configuration: an API key, a base URL, a default folder, a list of watched repositories. Paperclip gives plugins two ways to expose that to you.

Auto-generated forms. If the plugin ships a JSON Schema describing its configuration, Paperclip renders a form automatically on the Configuration tab. You fill in the fields, click Save Configuration, and Paperclip stores the values securely. For plugins that support it, a Test Configuration button appears alongside save — it sends the current form values to the plugin's worker and reports back whether the config works, without persisting anything.
Custom settings pages. A plugin can also contribute its own settings UI — a multi-step wizard, a visual editor, a connection builder — via a settingsPage slot. When that's present, Paperclip renders the plugin's custom UI instead of the auto-generated form. Everything still lives under the same Configuration tab so you always know where to look.
Secrets
Fields the plugin marks as secret (API keys, tokens, passwords) are stored encrypted and never redisplayed in plain text. The form shows a masked placeholder once a secret has been saved; to change it, type a new value and save again. Leaving the masked placeholder as-is keeps the existing secret.
Permissions sidebar
To the right of the settings form, the Permissions card lists the capabilities the plugin's manifest declares — a short, readable list of what this plugin is allowed to touch (for example, "read issues in this company", "write to project workspaces", "send outbound webhooks"). These are the same capabilities the upgrade_pending gate checks against on upgrade. If a plugin's permissions list doesn't match what you think it should be doing, that's a signal to investigate before enabling it.
Jobs, webhooks, and logs
Plugins don't just sit there. Many of them run scheduled jobs — a sync every 15 minutes, a nightly reconciliation, a cleanup pass every Sunday — or receive webhooks from external services. The Status tab on the plugin detail page is where you see that activity.

The tab shows:
- Worker process — whether the worker is running, its process ID, uptime, and how many crashes it has recovered from. If the worker crashes repeatedly, the crash count and last-crash timestamp surface here before anything looks broken in the rest of the UI.
- Recent job runs — the last handful of scheduled jobs the plugin fired, each with a status dot (green success, red failed, blue running, grey cancelled, amber queued), the trigger that caused it, and a relative time. A green dot and a short duration is the thing you want to see repeating.
- Recent webhook deliveries — incoming webhooks, each with a status and duration. Useful when you're debugging an integration that isn't firing.
- Health status — aggregate check results, polled every 30 seconds while the plugin is
ready. If a specific check is failing (for example, "can reach external API"), you'll see it called out here long before it becomes a crash. - Recent logs — the last 50 log entries the worker emitted, colour-coded by level. This is your first stop when something looks off.
The whole tab refreshes on a 30-second cycle, so you can leave it open while you tweak config or trigger a manual run elsewhere in Paperclip.
Interpreting job status dots
The coloured dot next to each job run summarises the outcome at a glance:
- Green — the job succeeded. A steady stream of green dots at the expected cadence is what a healthy plugin looks like.
- Blue (pulsing) — the job is running right now. If a blue dot sticks around for much longer than you'd expect, the Recent Logs panel below is where you look next.
- Amber — the job is queued, waiting for the worker to pick it up. Brief amber is fine; persistent amber usually means the worker is busy or stuck.
- Red — the job failed. The log entry with a matching timestamp will have the reason.
- Grey — the job was cancelled, typically because you disabled the plugin while it was scheduled.
Webhook delivery dots follow similar colours: green for processed, blue for received, amber for pending, red for failed.
Authoring your own plugin
If none of the installed plugins do what you need, you can write one. Plugins are npm packages with a paperclipPlugin manifest block, a worker entry, and an optional UI bundle — the example plugins under packages/plugins/examples/ are a good starting point.
The full authoring path lives outside this guide:
- The
paperclip-create-pluginskill scaffolds a new plugin package, including the manifest, worker, and a minimal UI surface. - The Paperclip CLI (
paperclipai) wraps common authoring tasks — scaffolding, dev serving, building, and publishing. See the CLI overview and the plugin adapter documentation in the main Paperclip repository for details.
Once your plugin builds, install it with Install Plugin on the Plugin Manager page the same way you'd install anything else. During development you can also point the installer at a local path — the bundled Install flow is the same mechanism, just targeted at a package inside your checkout.
Developing plugins locally
If you're iterating on your own plugin rather than running a published one, the friendliest loop is the CLI-driven local-path install: paperclipai plugin init scaffolds the package, pnpm dev runs a watch build, and paperclipai plugin install <path> points Paperclip at the folder so the worker reloads each time dist/ is rewritten.
See Develop a plugin locally for the full walkthrough — scaffolding flags, the reload semantics, when to switch back to an npm install, and the troubleshooting checklist for the moments edits stop reaching Paperclip.
You're set
Plugins give you a way to extend Paperclip itself — new pages, new widgets, new scheduled work — without forking the codebase. Install what you need, keep disabled what you don't, and let the detail page tell you when something needs attention.
If you're looking to extend what an individual agent can do rather than what Paperclip can show, see Skills and Agent Adapters next.
Quick reference
A cheat sheet for operating the Plugin Manager day-to-day:
| Goal | Action |
|---|---|
| Try a bundled plugin | Plugin Manager → Available Plugins → Install |
| Install a third-party plugin | Plugin Manager → Install Plugin → enter npm package name |
| Temporarily stop a plugin's jobs | Click the power button on the plugin row (green to grey) |
| Bring a plugin back online | Click the power button again, or Enable from the detail page |
Fix a plugin stuck in error |
Detail page → Status tab → read the log, then re-enable |
| Approve an upgrade that asks for new permissions | Detail page → review Permissions → Enable |
| Change configuration | Detail page → Configuration tab → edit form → Save Configuration |
| Verify a config before committing | Detail page → Configuration tab → Test Configuration (when available) |
| Permanently remove a plugin | Trash icon on the plugin row → confirm |
If you get stuck, the Status tab on any plugin detail page is the place to start — worker status, recent runs, and recent logs will usually point at the cause faster than poking at configuration.